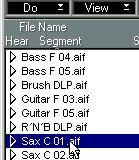
To rename a file, proceed as follows:
1. Double click on the existing name, or select the file and press [Alt]-[N].
2. Enter a new name or edit the existing one.
3. Click outside the box or press [Return].
P Renaming a file this way is much preferred to renaming it in the Explorer. This way, Cubase “knows” about the change and will not lose track of the file the next time you open the Song. See page 330 for details about lost files.
To make a duplicate of an audio file, proceed as follows:
1. Select the file.
2. Pull down the File pop-up menu and select “Duplicate File”.
A file dialog opens where you can enter a name and location for the duplicate. To minimize the risk of Cubase VST “losing track” of your audio files, use this function instead of duplicating files in the Explorer.
If you want to remove one or more files from the Audio Pool without actually deleting them from the hard disk, proceed as follows:
1. Select the file(s).
Selecting more than one is done just as with any other object in Cubase, by clicking in combination with the [Shift] key.
If you want to remove the file from the Audio Pool and also delete the file permanently from the hard disk, proceed as follows:
1. Select the files.
2. Hold down [Ctrl] and press [Backspace].
A dialog box asks you if you are sure you want to follow through. Remember that this operation can not be undone!
This function finds all files in the Audio Pool that are not used in the Song, and removes them from the hard disk.
1. Pull down the File pop-up and select Delete Unused Files.
If there are unused files in the Audio Pool, a dialog reminds you that the operation cannot be undone, and asks you if you want to go on.
Please note that you cannot undo this operation.
You can create a “default” segment for the file, that is one that plays the entire file.
1. Select the file.
The new segment can be edited to play any part of the file (see page 333).
There are situations when you may want to replace an audio file in the Pool with another, but keep all segments that are in use. As an example, consider the following situation:
You have used an external Wave Editor (see the chapter “Using an External Wave Editor”) to perform some dynamic or spectral editing on an audio file. To be on the safe side, you save the edited audio file under another name than the original. When you return to Cubase VST, you will want to be able to replace the original file, so that all segments reference to the new, edited audio file instead, and preferably be able to switch back if you change your mind. Proceed as follows:
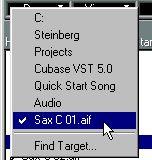
1. Click on the symbol in the Disk column for the file.A dialog appears, asking if you want to “Re-find” the file. Click “Yes”.
2. In the file dialog that appears, select the audio file that should replace the existing file in the Pool.
In our example above, this would be the edited version of the audio file.
3. Another dialog will ask you if you are sure. Click “Sure”.
The audio file in the Pool is now replaced with the one you selected in the file dialog. The segments keep their names and, if possible, their start and end inset positions. If you later want to switch back to the original file, just repeat the operation.
P Please note that the replacing audio file must be of the same length as the original file, for the segment start and end insets to be relevant! If you perform any editing that involves changing the length of the file (such as time stretch, truncating, etc), this method does not work, since you will have to create new segments.