The Crossfade function allows you to create a smooth fade between two sections of audio. It also allows you to add a fade-in or out to only one Event. It does so by creating one or more new files which contain a new portion of audio – the actual (cross)fade.
Events which play these crossfade files are then inserted into the Audio editor at the correct position. The Segment settings of the Events are changed, but the original files are not affected by the operation.
• It is not possible to create a fade from the end of one file, because there is no audio to fade after the end of the file.
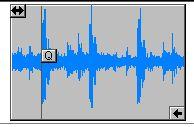 The file ends here.
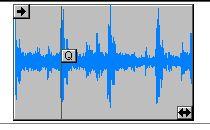
 • It is not possible to create a fade to the beginning of a file, because there is no audio before the beginning of the file.
The file starts here. You cannot fade in before this point.
 To check if there is any audio to fade to/from at the beginning/end of a file, check the Inset handles, as described on page 359 in this chapter.
P It is possible to crossfade between Events with a gap between them, but it might not create the desired result. If the program can’t make anything sensible out of the selection of Events you have made, it will tell you so.
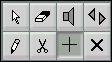
1. Select the Crossfade tool from the toolbox.
 2. Position the pointer in the Event you want to fade from, at approximately the position where you want the crossfade to start.
4. Release the mouse button in the Event you want to fade to, at approximately the position where you want the crossfade to end.
The following dialog box appears.

The Crossfade dialog. The display shows how the two Events will be “mixed”. The two pairs of arrows above the display indicate the start and end points for the fade “zones” in the two Events.
5. Drag the lower set of arrows to set the start and end points for the fade of the first Event.
If you want the fade to start earlier than you indicated when dragging with the Crossfade tool, you can numerically change the value in the XFade Start Pos value box. You will not be able to go past the start/end points of the entire Event.
6. Drag the upper set of arrows to set the start and end points for the fade of the second file.
If you want the fade to end later than you indicated when dragging with the Crossfade tool, you can numerically change the value in the XFade End Pos value box. You will not be able to go past the start/end points of the entire Event.
7. Use the mouse to draw the shape of the fade in and fade out curves.
Drawing in the overlapping area only affects the start segment (the fade out). If you want to change the overlapping part of the fade curve for the end segment (the fade in), start dragging to the right of the overlap and keep dragging to the left. You can also hold down the [Ctrl] key; when you do, drawing always affects the fade in, no matter where you start dragging.
8. As an alternative to drawing, you can use the buttons to the left of the curve display to select “preset” linear or logarithmic curve type.
The logarithmic curve will create the most natural fade.
9. Click Calculate.
A preview of the crossfade gets created, which you can see in the box below the curve display.
P Is is quite possible to introduce clipping (levels higher than the system can handle) with inappropriate fade curves. If this happens, adjust the curves and Calculate again.
11.When you have a fade you are happy with, click the OK button.
A new Event appears on top of the two you were fading between. This Event plays a new file which contains the actual crossfade. If you delete this Event (and file) you will return to the original “unfaded” join between the Events.
A method very similar to the one above can be used to create a fade-in or out from only one file:
1. Select the Crossfade tool.
2. Position the pointer in the Event you want to fade, at approximately the position where you want the fade-in/out to start.
You cannot start or end a fade outside of the start/end-points of the actual Event.
4. Release the mouse button at approximately the position where you want the fade-in/ out to end.
6. Click the OK button.
A new Event appears on top of (and grouped with) the one you had. This Event plays a new file which contains the actual fade. If you delete this Event (and file) you will return to the original Event.
It is also possible to automatically create a crossfade by overlapping two segments. Proceed as follows:
1. Select the Crossfade tool.
2. Press [Ctrl] and drag one of the Segments so that they overlap.
Or
3. Drag the Start or End Inset into another Segment.
4. Release the mouse button.
The Crossfade dialog appears, with the Crossfade range determined by the amount of overlap between the segments.