About EQing stereo channels
To add EQ to a stereo channel pair (or for a Group - see page 462), make the equalizer settings for the left side channel. Just as with the volume fader and other controls, the settings you make are automatically duplicated for the right side channel and vice versa.
P If you want to make independent EQ settings for one of the channels in a stereo pair, hold down [Alt].At the top of each audio channel strip in the VST Channel Mixer there are four buttons, labelled “INS”, “DYN”, “FX” and “EQ”. These all open the Channel Settings window. The “EQ” button is used to activate equalizing for the channel, but to be able to do that, you must first open the Channel Settings window:
P The DYN, INS, FX and EQ buttons are duplicated in the Inspector, which means you can open a Channel Settings window without displaying the VST Channel Mixer if you like.1. Click the “EQ” button for the channel you want to apply EQ to.
The Channel Settings window opens. This contains a duplicate of the VST Channel Mixer channel strip, an Insert section (see page 447), a section with effect send knobs (see page
442) and 4 EQ modules with an associated EQ curve display.
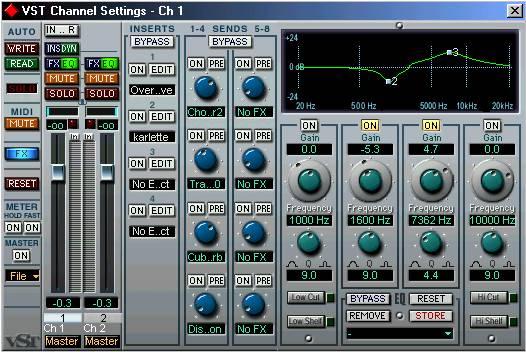 A Channel Settings window with two EQ modules active.
2. Activate as many EQ modules as you need (up to four).
This can be done in two ways:
• By clicking on their “On” buttons.
• By clicking in the EQ curve display.
If you click in one of the divided frequency areas, a new point is added. These points are numbered 1 to 4 depending on which frequency area you click. Clicking in the leftmost frequency area (20 - 500 Hz) activates EQ “1” and so on.
As soon as any of the EQs are activated, the “EQ” button indicator in the channel strip are lit and there will be a point added in the EQ curve display for each activated module.
3. Set the parameters for an activated EQ module.This can be done in several ways:
• By using the knobs.
• By clicking a value field and entering values numerically.
• By using the mouse to drag points in the EQ curve display window.
By using this method, you control both the Gain and Frequency parameters simultaneously. The knobs turn accordingly when you drag points.
• If you press [Shift] while dragging, only the “Q” parameter will be set.
The three basic EQ parameters are:
Gain Governs the amount of boost or attenuation around the set frequency. The range is ± 24 dB.
For the leftmost (EQ “1”) and rightmost (EQ “4”) modules, the following special modes are available:
Low Shelf Low Cut Hi Shelf Hi Cut
If this button is activated for the EQ “1” module, it will act as a Low Shelving filter. If this button is activated for the EQ “1” module, it will act as a High-Pass filter. If this button is activated for the EQ “4” module, it will act as a High Shelving filter. If this button is activated for the EQ “4” module, it will act as a Low-Pass filter.
• To deactivate an EQ module, click its “On” button, double click its point in the EQ curve display or drag its point outside the display.
4. Close the Channel Settings window by clicking on its close box or pressing [Return]. In the VST Channel Mixer, the “EQ” button indicator for the audio channel will now be lit, which means EQ is applied to that channel.
Opening the EQ Panel without opening a New WindowIf an Channel Settings window is open, and you want to make settings for another channel, you can have the new panel appear in the window that is already open, by holding down[Alt] and clicking the EQ button for the new channel.
This makes the Channel Settings window for the second channel “replace” the first. This way, you avoid cluttering up your work area, and it also allows you to make all FX/EQ settings in the same part of the screen.
EQ BypassYou can momentarily turn the EQ for a channel on and off, to compare the sound with and without EQ. There are two ways to do this:
• By using the Bypass button in the EQ section of the Channel Settings window.
• By right-clicking the EQ button for a channel in the Mixer or in the Inspector.
Using EQ Presets
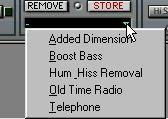
Some useful basic presets are included with the program, with descriptive names like “Boost Bass”. You can use them as they are, or as a starting point for further “tweaking”. To call up a Preset, proceed as follows:
• Pull down the Presets pop-up menu, by clicking in the Presets field, and select one of the available Presets.
 Storing EQ Presets
If you have made EQ settings you wish to store for use elsewhere in a Project, you can store them in a Preset. Proceed as follows:
1. After making settings, click on the Store button in the EQ section.
The settings are stored with the default name “Preset” + a number.
2. Double click in the Preset pop-up field and type in a new name if you wish.