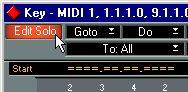
Using this function you can mute playback for all Parts that make up your Arrangement except for those currently edited in the open editor. To activate/de-activate Edit Solo click on its button in the upper left corner of the Status Bar in any of the editors, or use the corresponding key command (by default [A]).
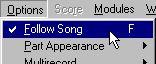
Normally, the Follow Song option will be turned on, making the Arrange and Edit windows “follow” the music at playback, so that the Parts or Events currently played always are visible. However, when you are editing Events in an editor, you may want to turn Follow Song off, either on the Options menu or by using a key command (by default [F]). This way the Events you’re working with will stay visible.
• If you activate the option “Stop Follow Song after Scrolling” in the Preferences–General– General dialog, Follow Song will temporarily be turned off, as soon as you scroll the window with the horizontal scrollbar.
Follow Song will remain deactivated until you press Stop and start playback again. If you want to activate Follow Song again without stopping playback, use the Follow Song key command twice.
In all of the MIDI editors you can set up a local Loop, which is a sort of “mini-cycle” for the Parts being edited. The Loop facility operates in addition to the Cycle, meaning you can Loop the Parts you are editing while Cycling Parts that are not being edited!
There are two principal ways to set the Loop:• Drag the mouse in the Ruler to draw the Loop area.
This will also automatically turn on the Loop (see below).
 This method does not work in Score Edit, since it has no Position Ruler.
• Use the mouse and/or computer keyboard to set the values in the Loop boundary boxes on the Status Bar.
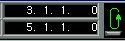 The Loop On/Off button.
These boxes can also be opened for editing by using key commands (by default [Alt]-[L] and [Alt]-[R], respectively).
Either way, the current Loop area is shown in blue on the Ruler when it is activated, and in light grey when it is deactivated.
Turning the Loop on or off
• Turn the Loop on/off by clicking on its button or by using a key command (by default [Alt]-[O]).
For this to work, you have to define the Loop first, as explained above.
When the Loop is active, the Parts within the Loop in the Edit window loop almost independently of the rest of the music. We say “almost”, because the Loop is still dependent on the Cycle. Every time the Cycle starts over again, so does the Loop.
The Loop is also used to direct editing to the Events inside the Loop. See page 173 in this chapter.