Adding Content to the Front Page.
First you are going to change the thumbnail
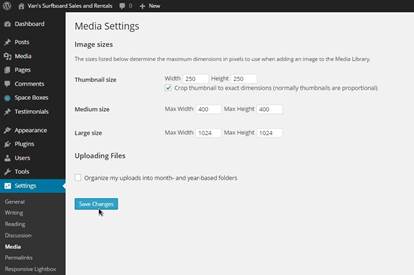
size for the images on your website. In your Dashboard, find
the Settings menu and select Media. By default the
thumbnail size is 150pix wide by 150pix high.
Change the width and height to 250 pix and
click Save.

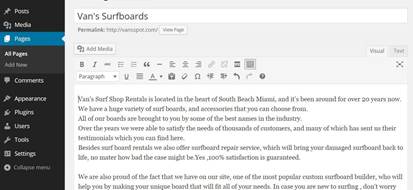
From your Dashboard go to Pages/All
Pages and find the Van’s Surfboards page than place your
cursor over so you can see the menu that will drop down, and click
on Edit.
By default your editor is set to visual. You
can see in the top right corner of it, that you have the option
text. If you click on it, the editor will turn into text mode,
where you can only use code for modifying your page, since you are
not going to use any code you want your editor to stay in visual
mode.
For the front page we are going to add an
image of your business and some introductional text. I would
recommend that you type the text into a text file first than copy
and paste it into the visual editor. When you are done bring your
cursor all the way up at the front of your text, then click on the
Add media button.

Use the steps that you already learned when
you uploaded your logo and favicon. From your Media Library
go to Upload Files, click SELECT FILES, find and
select the image from your computer, change the title add Caption,
Alt text and description, change the Size to medium and click on
INSERT INTO POST button.
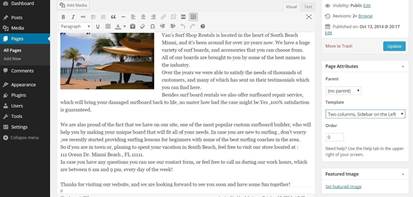
On the right of the editor, under “Page
Attribute” for the option Template, default template is
selected, which is the template that you already have selected in
the Nirvana settings.
Select Two columns, Sidebar on the
Left and click Update.

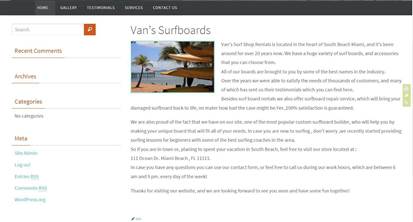
Now if you refresh your website you will see
that the sidebar is on the left, and you have the image and the
company description on your front page.
The next step is to insert a video in the
Left Sidebar.


